
Posted by: Daniel Boterhoven on Sun Oct 10
The ideas for the apps that provide these capabilities started somewhere. They were worked on, and improved over many years to become the products they are today.
Ideas are easy to come by – it’s the refining of an idea that truly shows its potential or lack thereof. So, today, we’re going to discuss the process of idea refinement.
But first let’s dig further into why it’s important to develop your idea properly before looking at the refinement steps.
Having an overall idea about what you want your app to achieve is a great start. But if you are going to invest your own or someone else’s capital to develop the app, it’s critical to get the idea down onto paper in as much detail as possible. There are important reasons for this.
First off – a general idea for an app can be easily accepted by many people. It’s over the details that people usually differ. Without similar backgrounds, personalities and life experiences, it’s likely every person will have a different idea of your app. Putting your concept on paper, in one form or another, will help all parties to visualise a uniform idea.
Refining your idea will furthermore help you to discover vulnerabilities in your concept. Once you can visualise on paper how the app should work, you may notice that doing things a certain way may not be intuitive or even possible. This will help you discover problem areas early on, also to find solutions quickly.
Lastly, this step will enable you to hand it to a designer or developer for an accurate quote. They will also be far more willing to create the product if they have a clear and well-thought-out concept to work with.
So, with the understanding that we must refine our app idea, let’s consider the process.
The first step of refining your idea is the process of summarising your app concept. This summary should include:
This can typically be accomplished within a one-page document. As said, the act of writing this summary will likely already have you discovering and resolving issues in your concept, which is great if it does. But to really start developing the idea, you will also need to make some sketches.
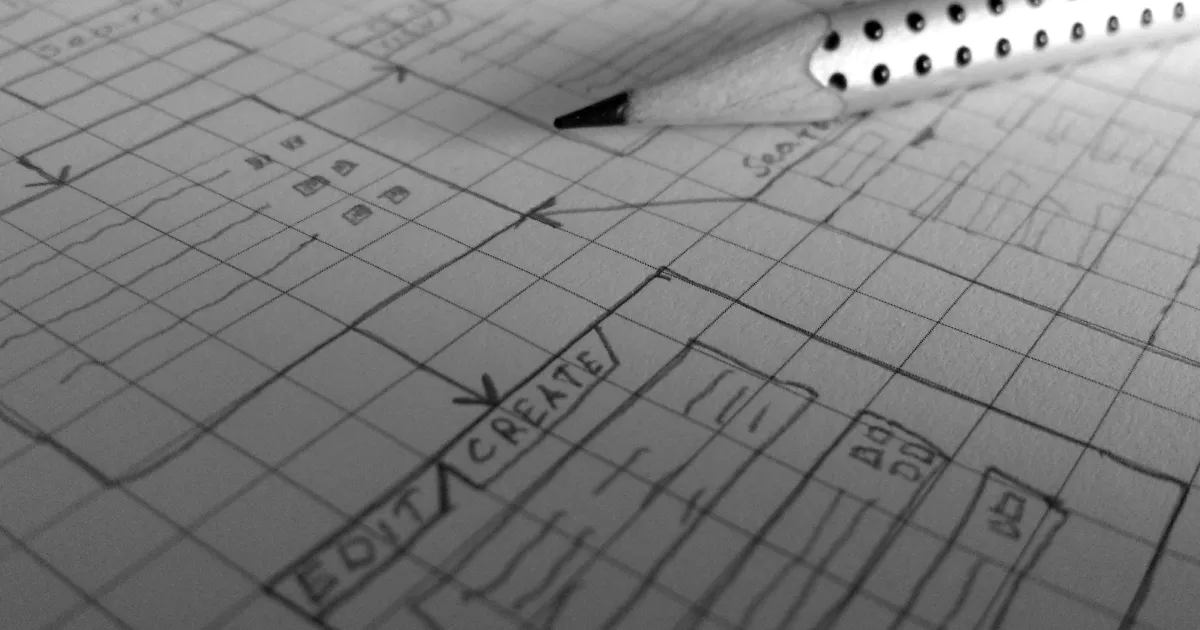
Sketches are perfect for helping you visualise a working prototype of your app. They should be easy to draw, and you can stop and re-start as many times as necessary.
You will want to make sure your sketches cover two things. They should:
By creating sketches with these details, other members of your team or third parties will have a clear picture of how your app works, what it does and what it can accomplish.
Having created the initial sketches, it’s time to go into more detail. Now you will be drilling down into individual views and elaborate on key elements.
At this point, you may want to migrate your pencil sketches to a more refined wireframing platform, such as Balsamiq or MockFlow. This step involves taking the initial sketches of the views and fleshing them out with all the elements that you think are necessary. Elements could include labels, images, headings, input fields, scroll bars, tabs, and anything else that comes to mind.
By mapping out the inner details of your app components, you will encounter questions which are more effectively tackled at this early stage – before any design or coding work has been done.
It’s highly likely you will need to utilise third party services to develop more advanced app functionalities such as maps, notifications, ads and so on. It’s best to identify these as early as possible, and factor them into your one-page app summary. This way, everyone will be aware of the necessary integration.
Third-party services will typically come with a price tag. It’s prudent to be aware of this in the idea stage, as knowing the cost will help determine the project viability.
Lastly, doing research can make you aware of additional third-party services that may further add value to your app. These services, once integrated into your app, can be used as upsells or offered in premium pricing plans.
You are now at a point where you have refined your idea into a fully-fledged product summary. Simply by sharing the one-page specification and the wireframes, others can better understand what your app is about and how it works.
The last thing that needs consideration is your app architecture. Apps can be built in many different ways, but there are four primary categories. Which one to choose will depend on your requirements.
The steps to refining an app idea are:
Taking these steps should help give you a clear starting point for your project and can be used as a guide throughout. Idea development is an enlightening process which, if done right, will pave the way to a successful product delivery.
…
Photo by RealToughCandy.com (RTC) from Pexels
Subscribe for updates